Additional Features
Workspaces
Use workspaces to separate short links, QR codes and Microsites for each project, for example, when working with different clients.
This feature is available on the Monthly and Annual plans.
Introduction to workspaces
Workspaces make it easy to work on different projects with your team. Instead of mixing short links, QR codes and Microsites from different projects, you can easily separate them one by one.

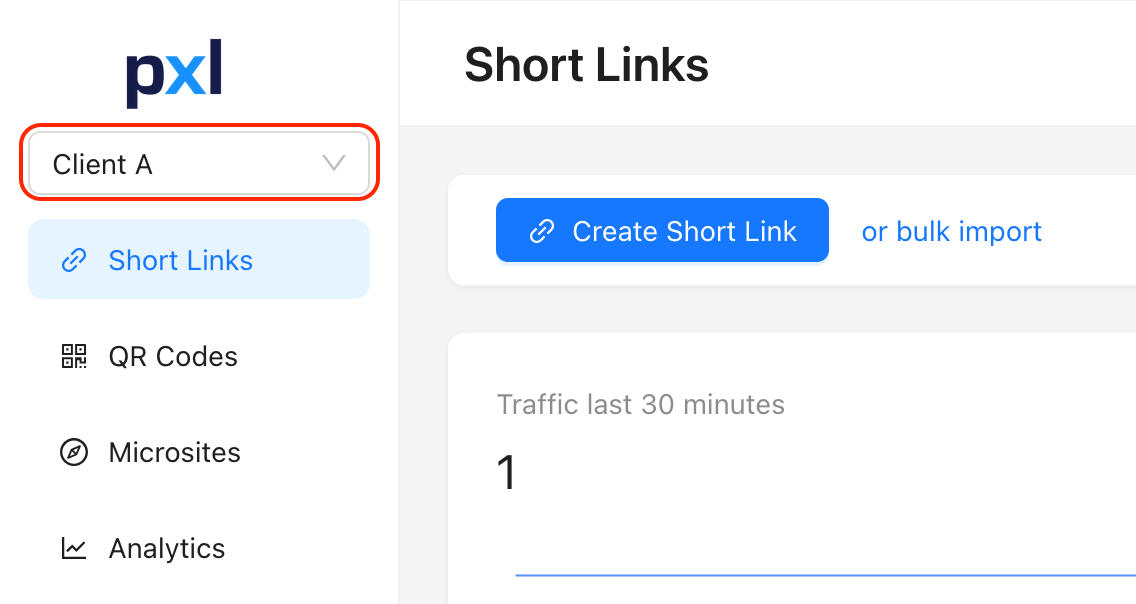
Change workspaces by clicking the dropdown field in the top left corner below the Pxl logo.
Creating a new workspace
Creating a new workspace is easy.
- Log in to your Pxl dashboard
- Click on the Default workspace dropdown in the top left corner below the Pxl logo
- Click on + Add Workspace to create a new workspace
- A new workspace with the name "New workspace" is now created
Changing the name of a workspace
You can change the name of any workspace you are in.
- Log in to your Pxl dashboard
- Click on Settings in the lower left corner
- Choose Workspace to see the settings for the current workspace
- Click on Update to set a new name for the workspace
Moving assets between workspaces

You can move assets like short links, QR codes, Microsites and pixels between workspaces.
- Log in to your Pxl dashboard
- Click on Settings in the lower left corner
- Choose Workspace to see the settings for the current workspace
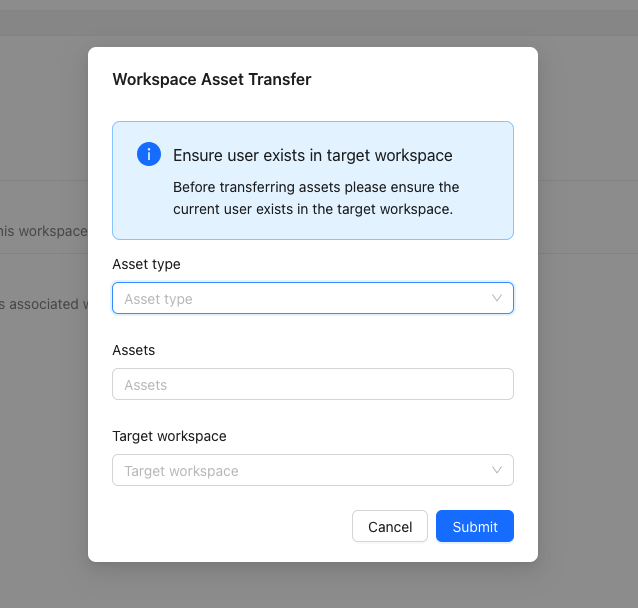
- Click on Transfer and a new window opens up
- Now choose which assets you want to move from the current workspace to another one
Before transferring assets, please ensure that you have access to the target workspace. Otherwise you will not be able to access the transferred assets in the new workspace.
Deleting a workspace
You can delete any workspace except for one.
- Log in to your Pxl dashboard
- Click on Settings in the lower left corner
- Choose Workspace to see the settings for the current workspace
- Click on Delete workspace to delete the current workspace
You should know!
Deleting a workspace cannot be reversed. All data is gone once you delete it.